3D printing technology is a well-planned and prepared process of transforming virtual models into physical objects. The 3D printing process consists of 6 stages.
Below, we will explain the content of the 3D printing stages using the example of the most common FDM (Fused Deposition Modeling) technology, which involves the formation of objects by layer-by-layer application of molten polymer filament.
- Creating a digital model
The 3D printing process begins with the development of a virtual image of the future object in a 3D editor or CAD program (3D Max, AutoCAD, SolidWorks, etc.). To create models, you will need a package of professional programs and modeling skills or order the services of a 3D modeling specialist.
It takes from a few minutes to several hours or days to create a virtual image of a future object, depending on the complexity of the model. If the model has a complex design, it is better to entrust its development to professionals.
In some cases, 3D scanners are used to create virtual images of future objects. In this case, the scanned objects get all the defects that need to be edited. To get a highly accurate object, it is best to combine these two methods.
You can also find ready-made virtual models on the Internet, on specialized sites dedicated to 3D printing.
- Export the 3D model to STL format
When the modeling is complete, you should convert the resulting file to STL format. To do this, select the “Save As” or “Import/Export” option in the menu, depending on the program you are using.
Before exporting the file, you should specify the level of detail of the model or the level of its polygonality. If you select the “Fine” option, the breakdown will be dense, the finished file will take up a lot of space on your computer’s hard disk and will take longer to process by the slicer, but the user will get an object with a high-quality surface. If you choose the “Coarse” option, the split will be less detailed, the finished file will take up less space on your hard drive and will be processed faster in the slicer, but the quality of the external surfaces will be much lower than with a precise split.
- Generate G-code
An STL file with a future object is processed by a special program, i.e. a slicer, which translates it into a control G-code for a 3D printer.
When preparing a 3D model file for printing, you need to select the print quality, i.e. wall thickness, filament feed speed and movement, support for overhanging surfaces, and other parameters.
Slicer programs cut the model into thin horizontal plates and convert it into a digital G-code that the 3D printer can understand.
The slicer program sets the trajectory of the 3D printer’s print head when applying the consumable.
Thus, the model is prepared, converted to STL format, and its G-code is generated. Now the object is sent for printing.
- Preparing the 3D printer for operation
At the stage of preparing a 3D printer with FDM printing technology for operation, you should stick a special film on the working platform or apply a special solution, and then load the filament into a special compartment.
Many specialty stores now offer a special protective film for 3D printers. The film is glued to the platform, and then the edges are cut with a utility knife. If bubbles form under the film, they need to be released by piercing it with a needle. Before printing, it is recommended to degrease the film by wiping it with alcohol.
The most popular types of plastic for 3D printing are ABS, PLA, PETG. Dirty, damaged, or broken filaments should not be used for printing, as they can damage the printer and disable it. Insert the end of the filament into the feed opening and push it forward until it starts to extend out of the nozzle. Now you can start printing.
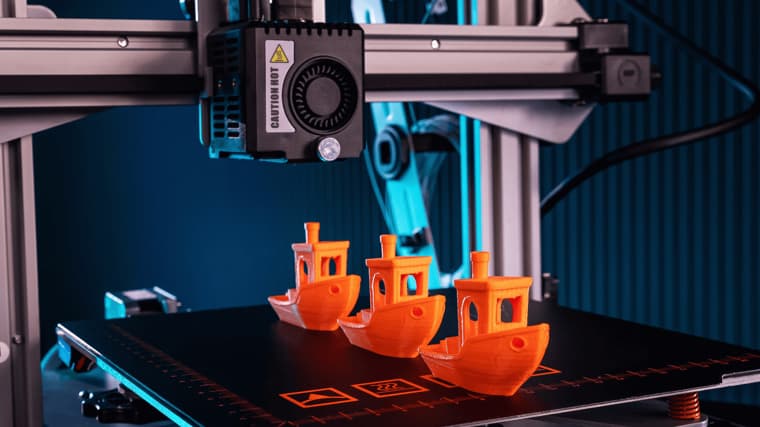
- Printing a 3D object
The most important elements of a 3D printer are the build plate and the print head. The build platform is where the finished object is formed. During operation, the platform moves up and down along the Z-axis. The print head extrudes a molten polymer filament onto the work platform, forming a finished object layer by layer. The 3D printer print head moves horizontally and vertically (X, Y axes).
The process of three-dimensional printing is quite simple. The print head extrudes the first layer of molten plastic into the working area, after which the platform is lowered to the thickness of the layer and the formation of the next layer begins, which is superimposed on top of the previous one. After each layer is printed, the platform is lowered down, and this happens throughout the entire printing cycle until the finished object appears on the platform.
The time it takes to print a product depends on its complexity. There are products that can be printed in 1 hour, and there are those that can be printed for 50 hours.
Of course, different models of 3D printers have their own peculiarities, but the basic principles remain the same.
- Finishing the object
If the object has overhanging elements, protrusions, the 3D printer uses support structures during printing. To understand what this is, take a look at the following photo.
You are looking at a digital model. Printing of the object starts from the bottom, and the printer will print such parts without any problems, since they touch the surface of the working platform. But what about the parts that hang in the air and do not come into contact with the build platform? The printer needs some kind of base, whether it’s the build platform or previous layers of material, to build up the layers of molten plastic, because it can’t print in a void. To print such overhanging parts, the 3D printer uses support structures, which are shown in the following image.
By adding structures, the parts do not hang in the air, but rest on the build platform, allowing the printer to print them.
When printing is complete, the support structures are removed. If the supports are printed from the same material as the main model, it can be difficult to remove them. Cutting or breaking off such structures damages the surface of the object. Such surfaces can be treated with putty and then painted in the future.
Article prepared for you by Jeff Vertes, analyst of Bestcasinosincanada.net